LIQUID CRYSTAL MARBLED BOWL
Overview
I developed an interactive surface design technique that gives this bowl color-changing properties when exposed to heat.
Process Documentation
My goal was to make something interesting out of materials I have on hand and document my design thinking and fabrication process. The first step of my process is always figuring out what materials to use.
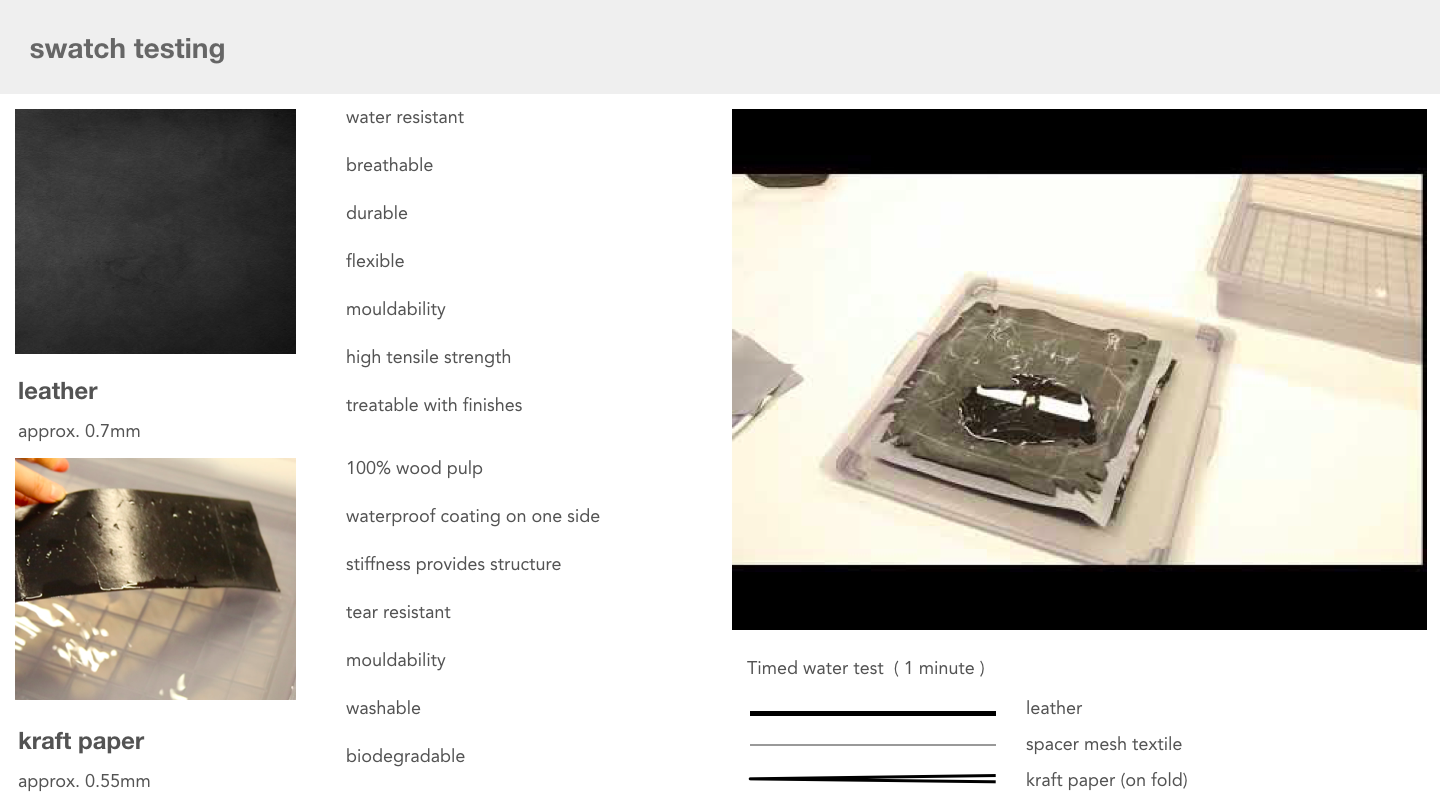
After analyzing the affordances of these material properties and swatch testing leather and kraft paper combinations, I decided to make an entry way bowl for my keys and work badge to keep a good habit of always knowing where they are.
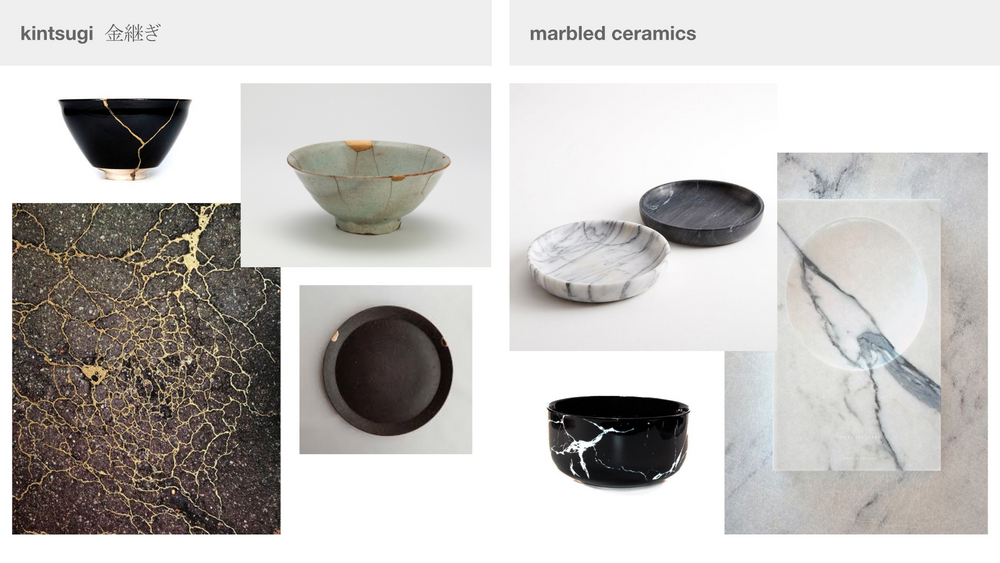
Inspiration
When I think of bowls, I am inspired by kintsugi and marbled ceramics. Kintsugi is the Japanese art of repairing broken pottery with gold lacquer. I like the notion of seeing beauty in imperfection, and find the natural lines of marble very elegant and sophisticated.
After doing a quick Youtube search, I went down a rabbit hole of marbling tutorials, including suminagashi, the Japanese art of paper marbling. I learned that it is possible to marble textile surfaces, so I decided it would be interesting to try with leather.
Subconsciously, I was also influenced by the bubbly swirls from the iPhone X campaign that had just come out at the time, and let the details of some of my favorite products influence the form and finishing of my design.

Surface Design — Marbling Preparation
I bought a marbling kit and gathered all my supplies to begin marbling for the first time.
The first step is mixing a mordant for the marbled design to adhere to the leather quickly and permanently. I mixed 2 teaspoons of aluminum sulphate to one gallon of warm water, let the leather soak in it for 20 minutes, then hung dry.
Next, I prepared the marbling base by mixing carrageenan, a natural seaweed derivative. I blended 2 tablespoons per gallon of warm water, and whisked to help dissolve the clumps.
Tooling
While I waited for the marbling base to dissolve, I made my molding tool from a cork bowl I found at a store. This was a lucky find because the shape and dimensions matched what I had in mind for the bowl.

I used a sander to round out the corners, gaffer tape to smooth out the sides, wood glue to attach the mold to the base, and clamped it down. The glue usually sets in about a half hour, but I left it clamped while I went on to marble the leather.
Surface Design — Marbling with Liquid Crystal
An element of surprise I wanted to add is marbling the leather with liquid crystal.
Liquid crystal are temperature sensitive compounds that temporarily change color with exposure to heat. Liquid crystal can be found in mood rings to LCD screens. I had a vial from when I was researching how to make my own LCD screens over the summer. According to its product description, it has a 12 color range between 60 - 90°F. Our normal body temperature is 97.8 - 99.3°F.

What I like about liquid crystal is that it goes on clear, so it doesn’t distract from the marbled matte surface. I like that it’s subtle and fun. Touching the bowl with warm hands or hovering a blow dryer over it allows you see the color change effectively.
Patternmaking
After marbling the leather, I measured the dimensions of my molding tool to draft a pattern for the bowl in 2D CAD.
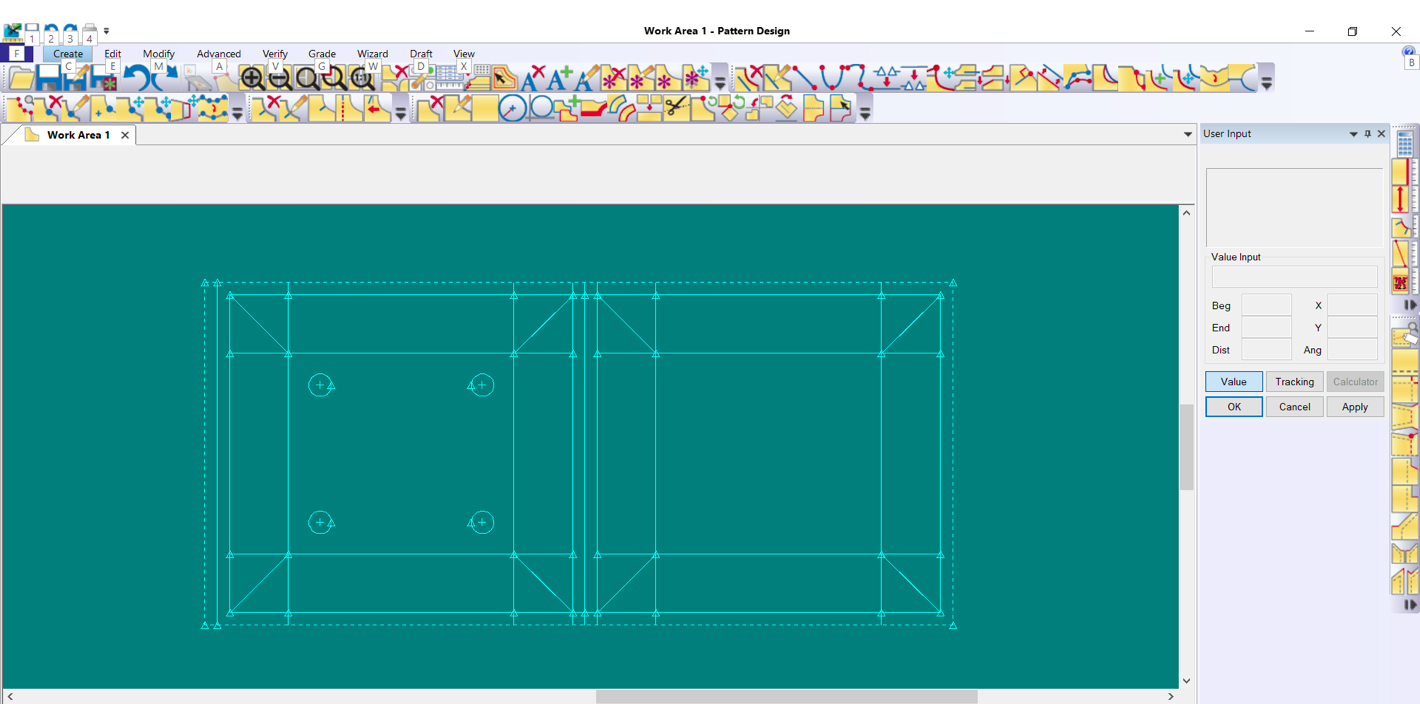
Pictured here is the pattern for the kraft paper layer. There is a center fold so the waterproof coating is on both sides. I marked the rubber feet placement and left allowance on all sides to fold into themselves to create a sturdy flange for the bowl.
Molding
The kraft paper was cut, folded, and clamped over the molding tool to keep its shape overnight. The next day, I applied steam and treated the marbled leathers with mink oil liquid to soften and waterproof them.
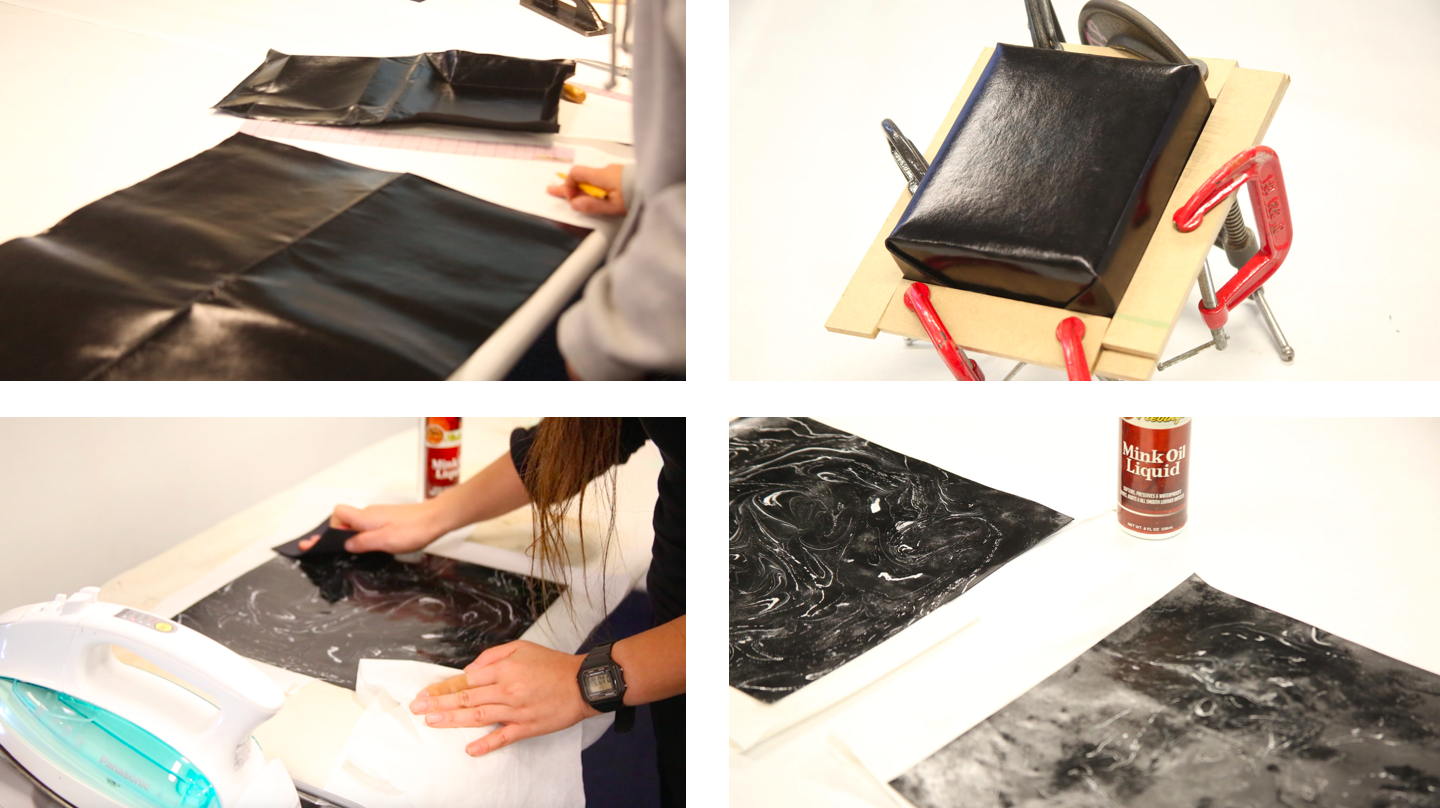
The kraft paper kept its shape after it was removed from the tool. I began wet molding the leather face down onto the tool to serve as the interior of the bowl. After that, I stacked the kraft paper layer over it, and began molding the second piece of leather face up over them both to serve as the exterior of the bowl.
I marked the rubber feet placement, punctured the holes to put them in, and clamped all three layers, on all sides overnight. The next day, I cut away the top edge excess, sanded it down, and finished the edge with a styling type.
Final Result
